Home Desserts How to Make a Lattice Pie Crust
Desserts
How to Make a Lattice Pie Crust
Making a lattice pie crust has never been easier with this simple step by step photo article with my favorite pie crust recipe included!
- Prep1 hr
- Cook1 hr
- Total2 hr
- Serves1 pie
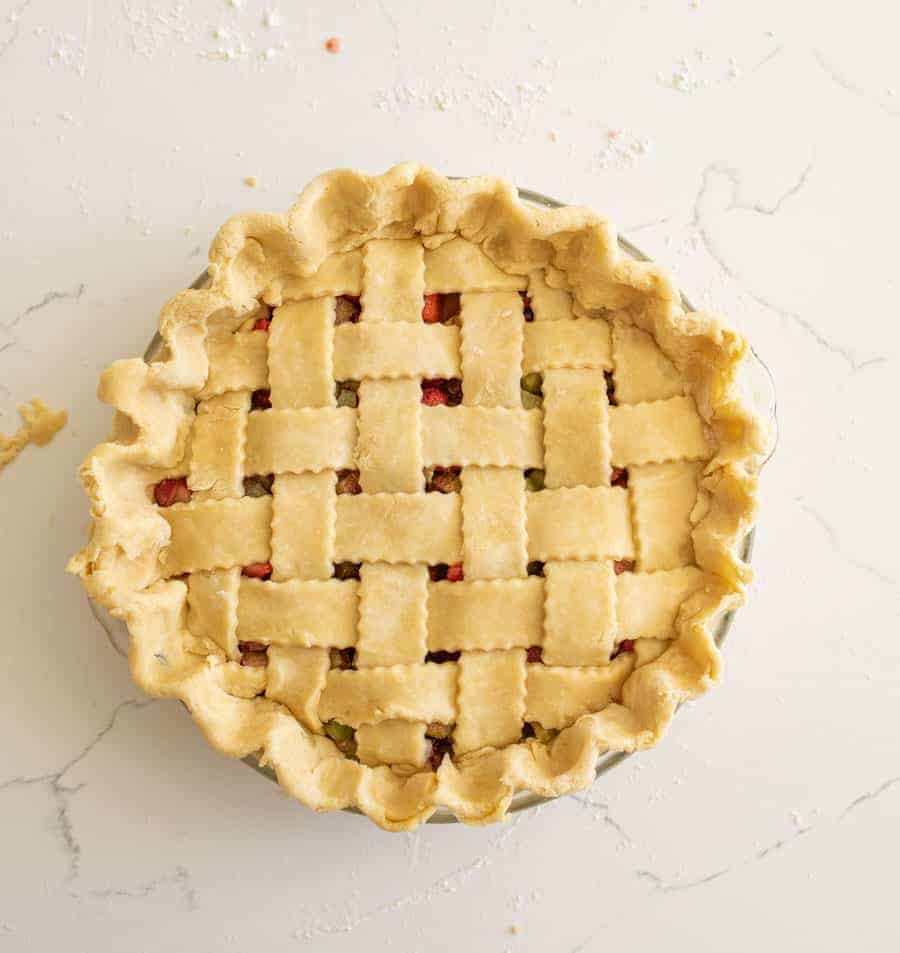
Learninghowto make a lattice top for a pieis a fun skill to master and an extra pretty way to finish a pie.
If you have never done it, making a lattice pie crust might be a bit intimidating, but I am here towalk you through each stepto a beautiful pie crust so that you can do it at home with ease!
Once you do it, you will wonder what has taken you so long to put this extra special touch on your fruit pies.
This lattice crust recipe works great oncherry pie,apple pie,strawberry rhubarb pie, andmixed berry pie.
Why You’ll Love This Recipe
- It’s afunway to add a little pizzazz to your pie.
- The lattice top can helpthicken and set fruit pies.
- It’snot hardonce you are familiar with the steps.
Recipe Ingredients
- All-purpose flour
- Salt
- Shortening
- Cold butter
- Ice-cold water
See the recipe card below for full information on ingredients and quantities.
How to Make a Lattice Pie Crust
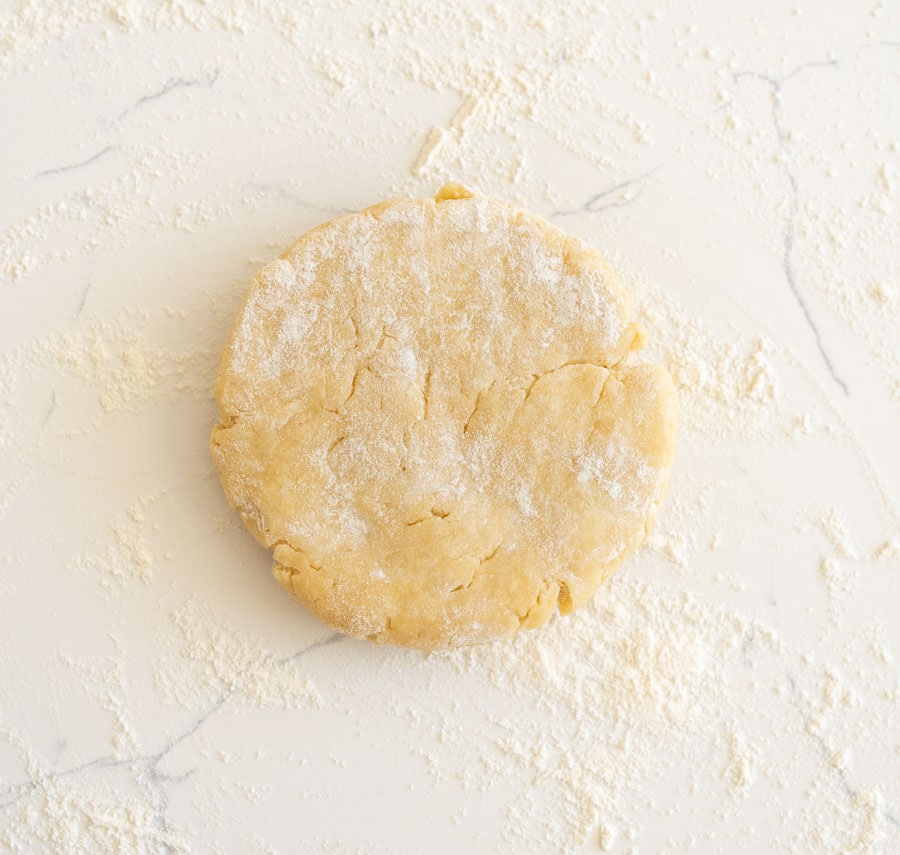
Step #1.Prepare your pie dough and let it rest in the fridge for at least 30 minutes before using.
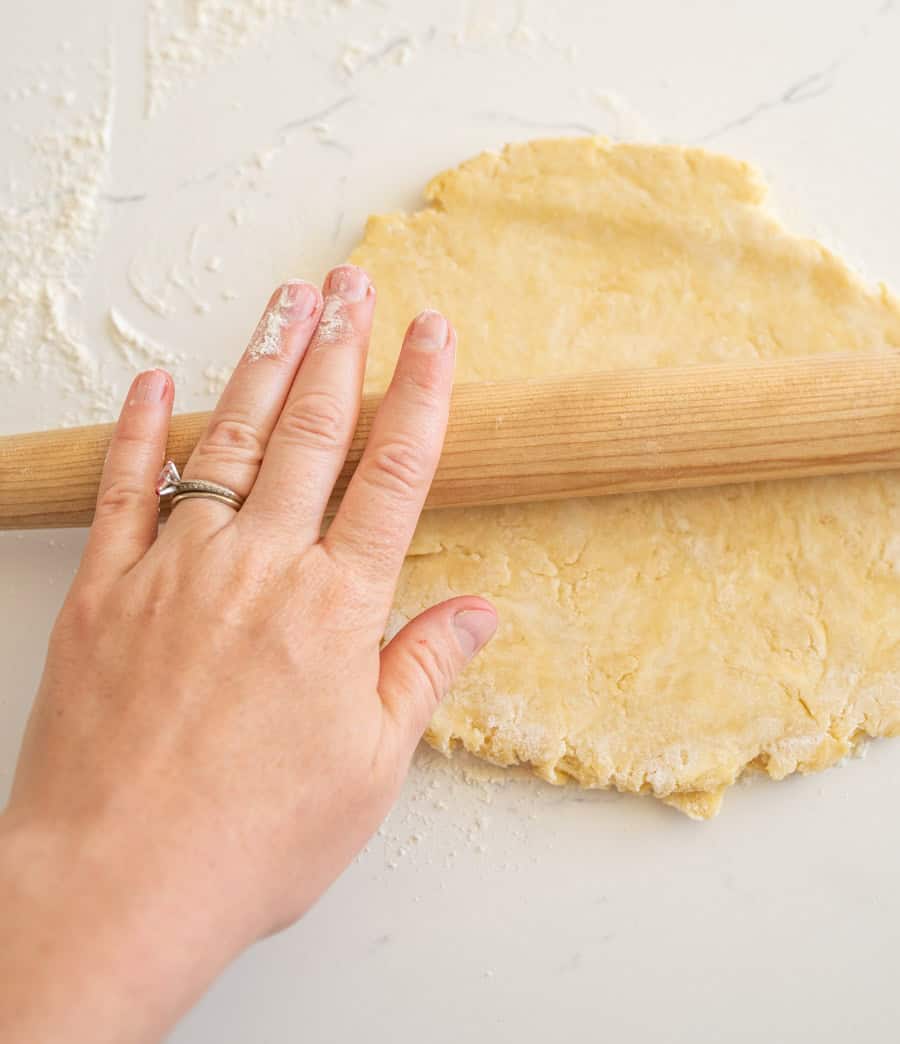
Step #2.Roll out the pie crust on a lightly floured surface.
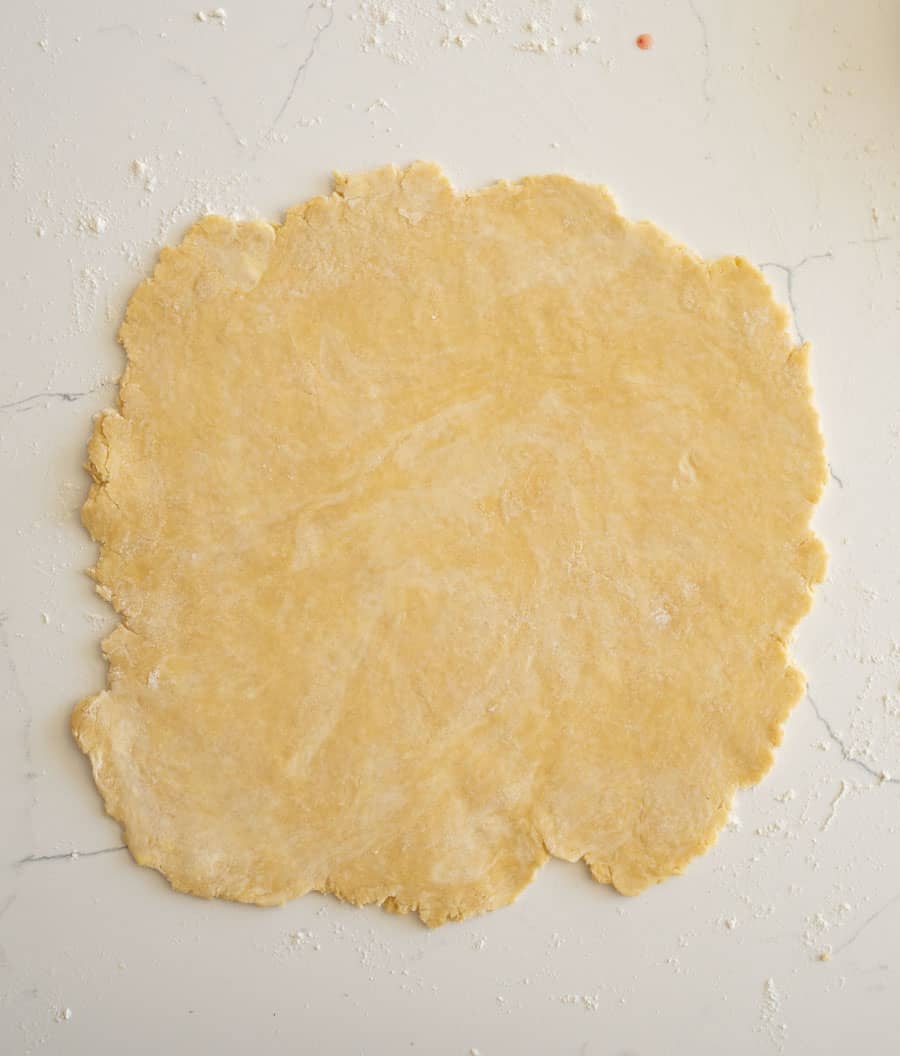
Step #3.Rotate the crust to help it roll out evenly. Add more flour to the rolling surface and the top of the dough as needed to ensure that the pie crust doesn’t stick.
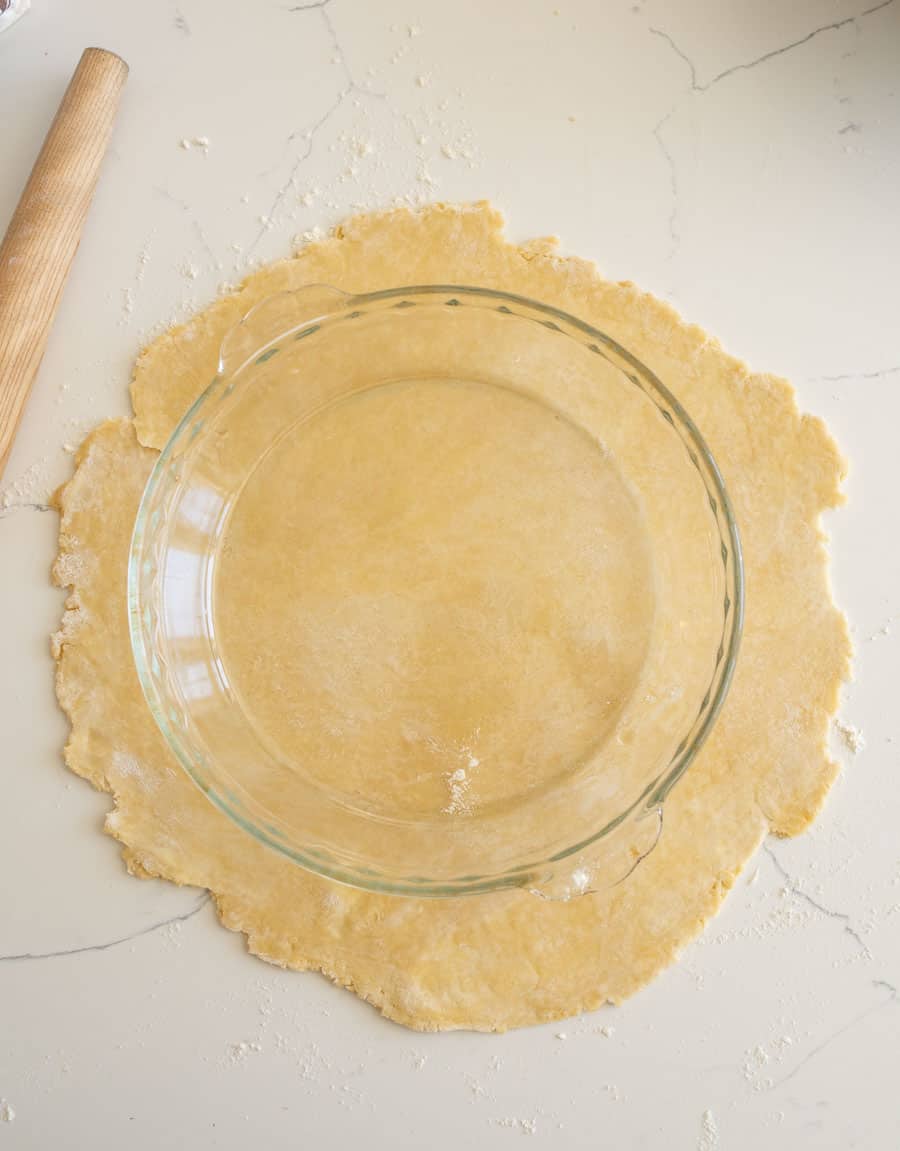
Step 4.Make sure that the pie crust is larger (by about 2 inches) than your pie plate by placing your pie plate on top of the rolled dough.
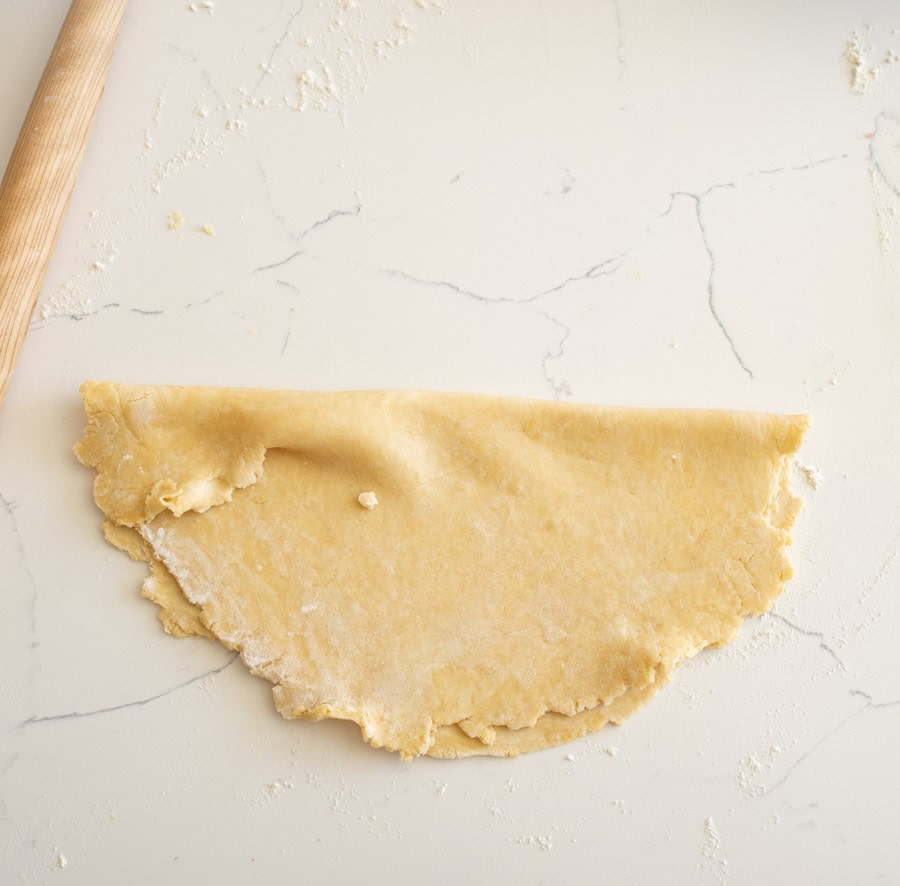
Step #5.Remove the pie plate from the dough and gently fold the pie dough in half.
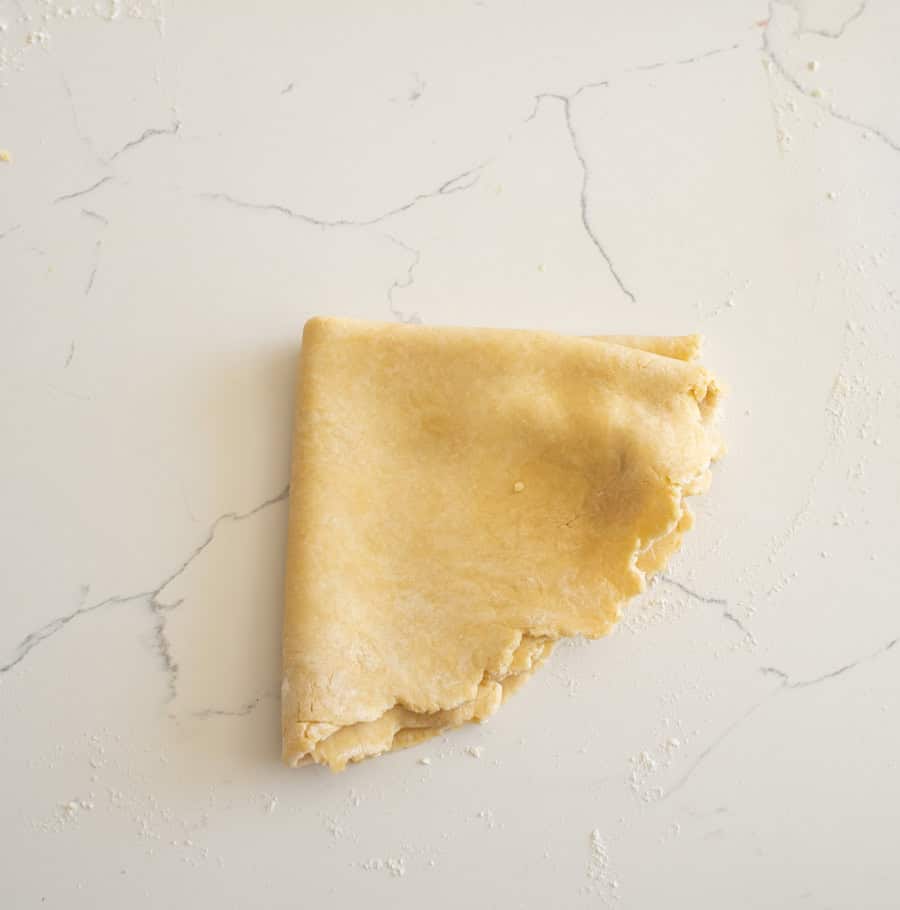
Step #6.Gently fold the pie crust in half again.
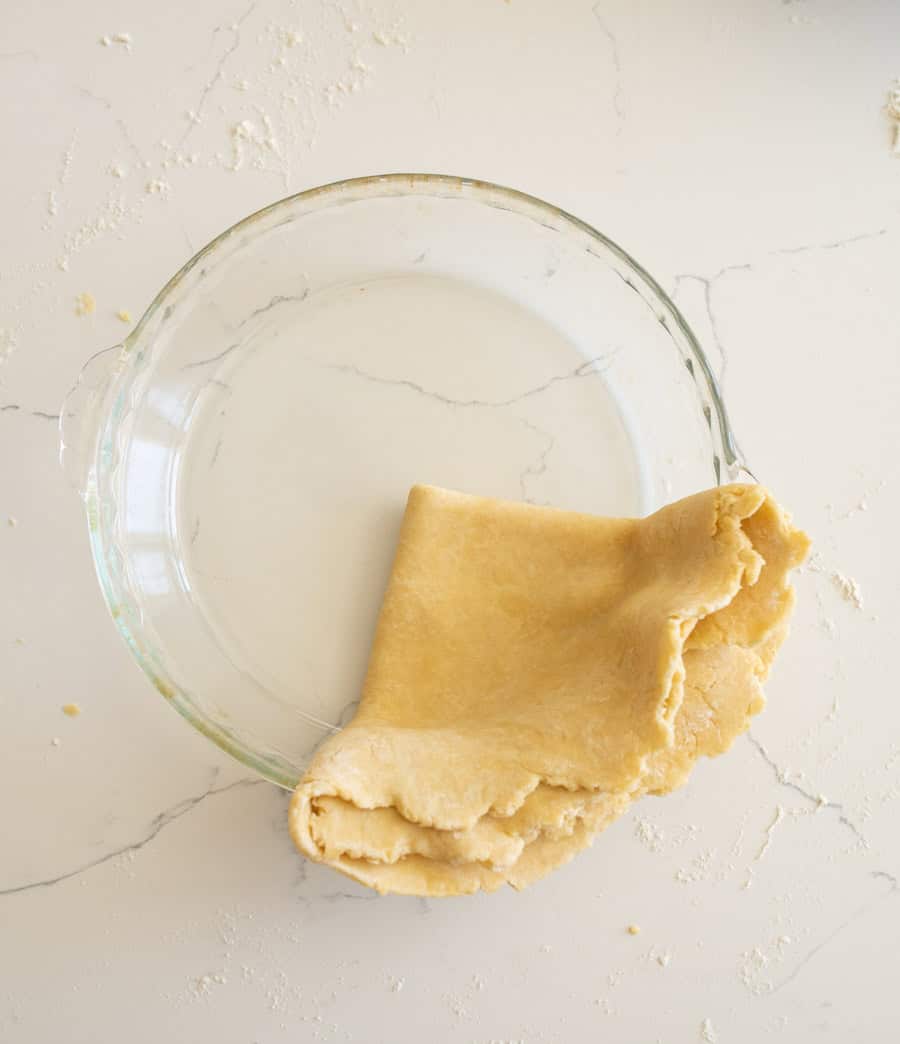
Step #7.Place the pie crust in an ungreased pie plate, stick it in the corner so that it evenly covers a quarter of the plate.
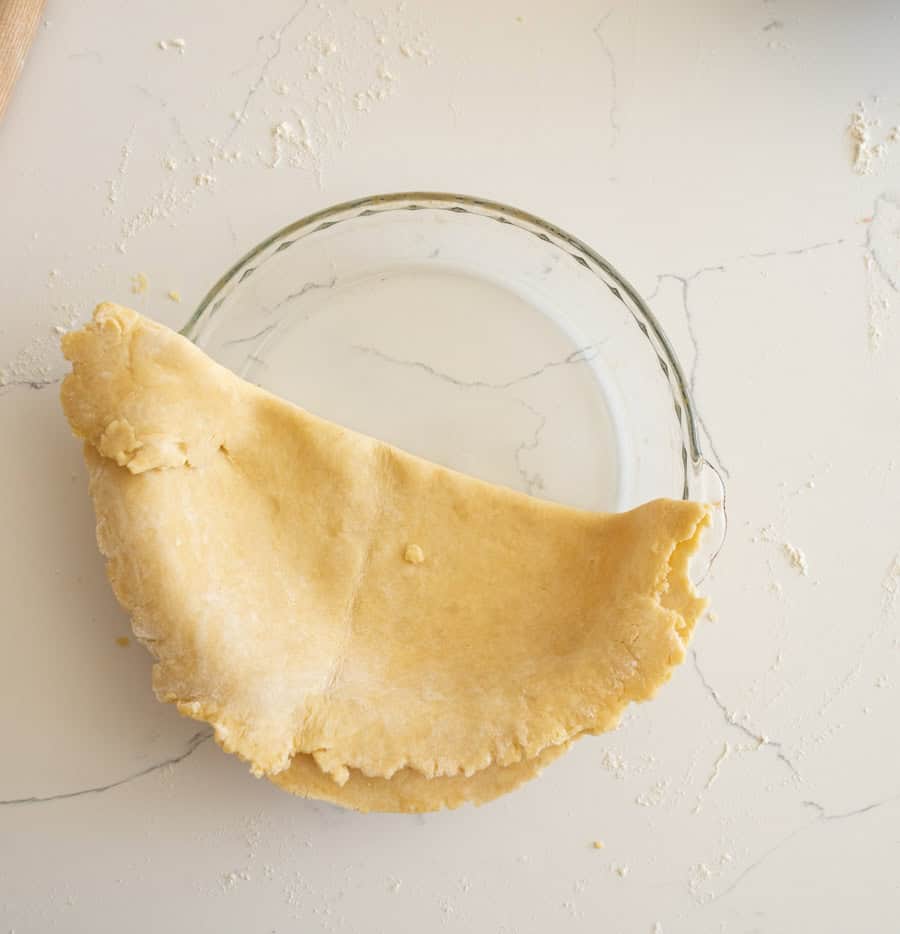
Step #8.Unfold the pie dough once so that it’s covering half of the pie pan.
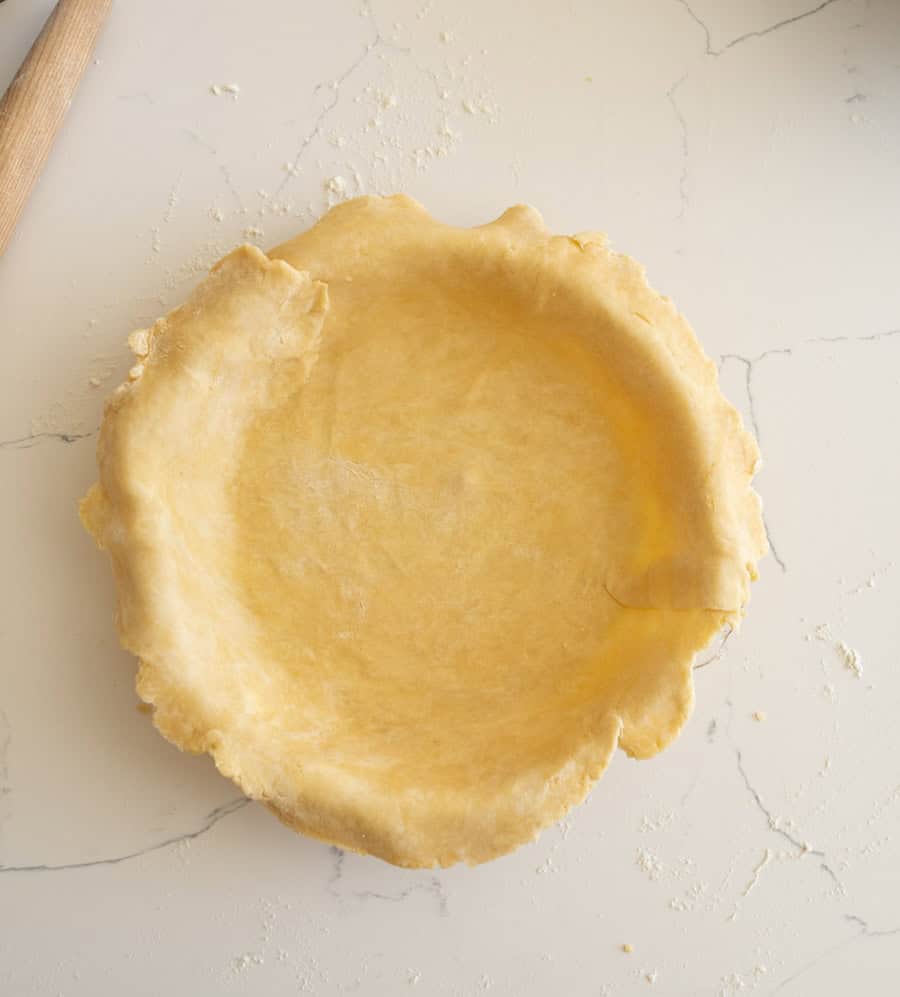
Step #9.Unfold the pie dough fully so that it fills in the whole pie plate. Gently press the pie dough into the bottom of the pan.
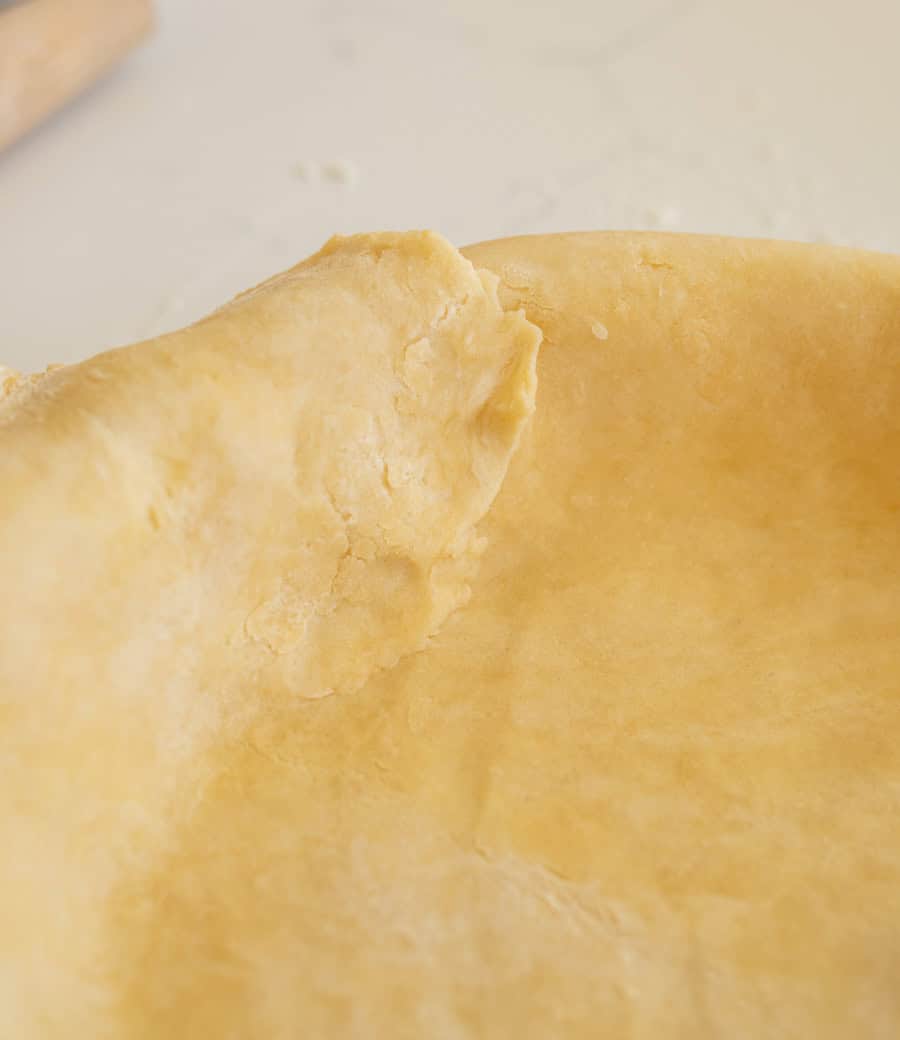
Step #10.Make sure that the edges of the dough fully cover the pie plate, pull the dough gently to adjust it.
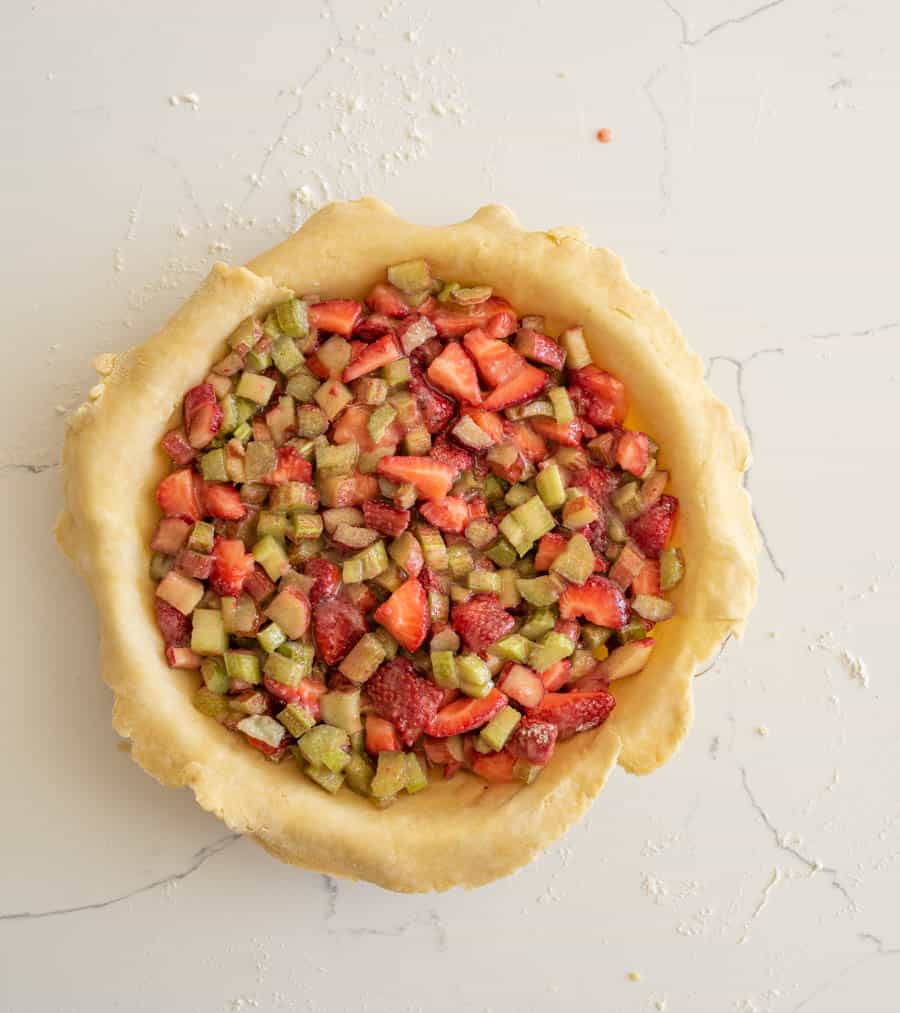
Step #11.Fill the pie with the pie filling as called for in your recipe.
Step #12.Roll out a second pie crust on a lightly floured surface like you did the first pie crust about 12 inches wide.
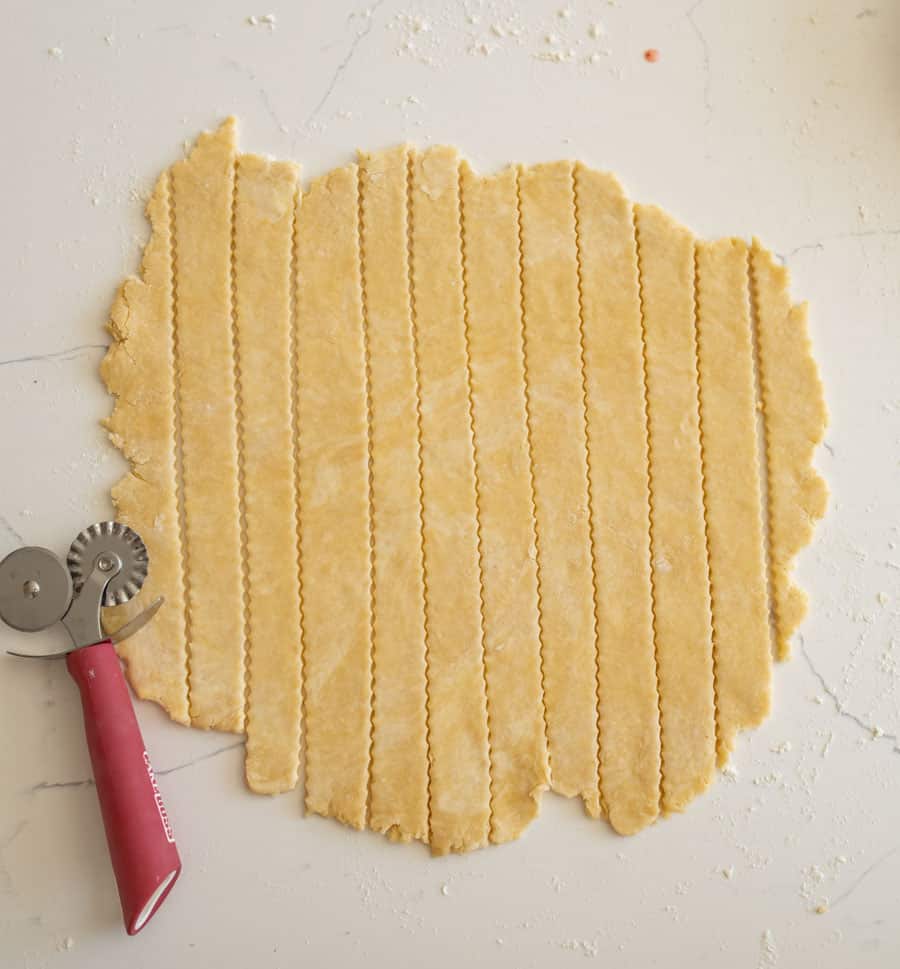
Step #13.Cut the pie crust into 12 even strips about 1-inch wide using a pizza cutter, pastry cutter, or sharp knife.
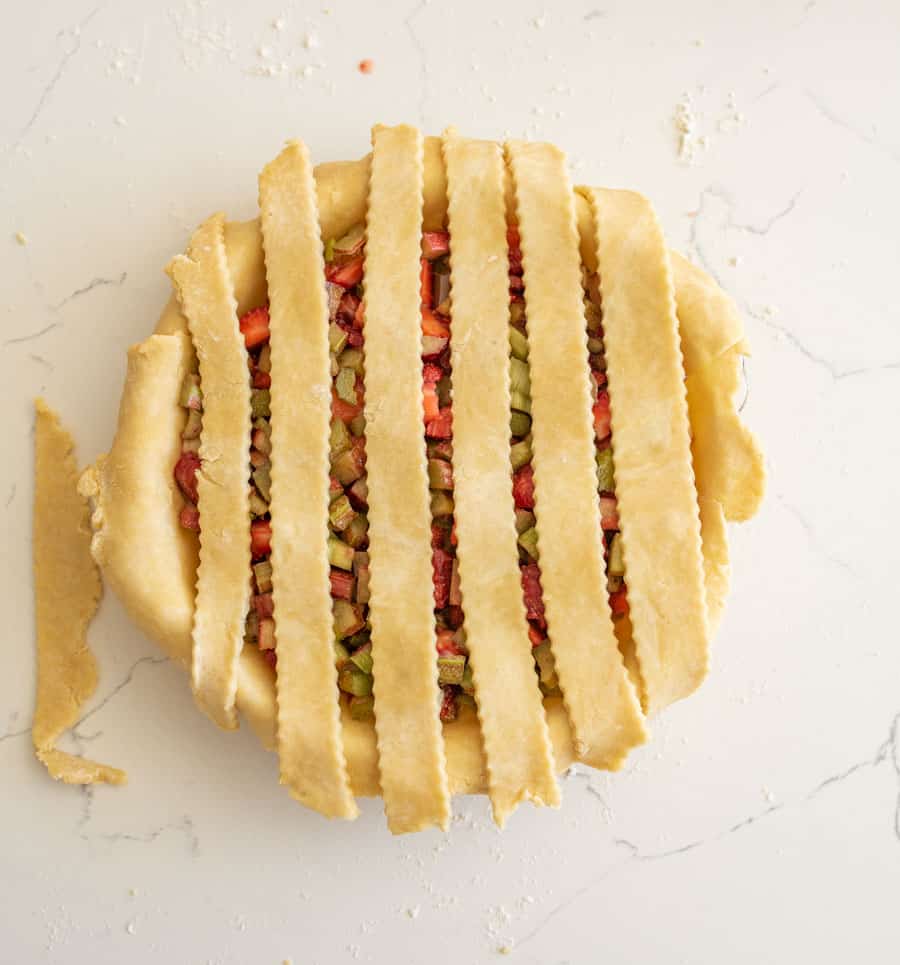
Step #14.Gently place 6 strips of pie dough evenly across the top of the pie running parallel to each other. Space the strips evenly across the top of the pie with about a 1/2-inch gap between each strip.
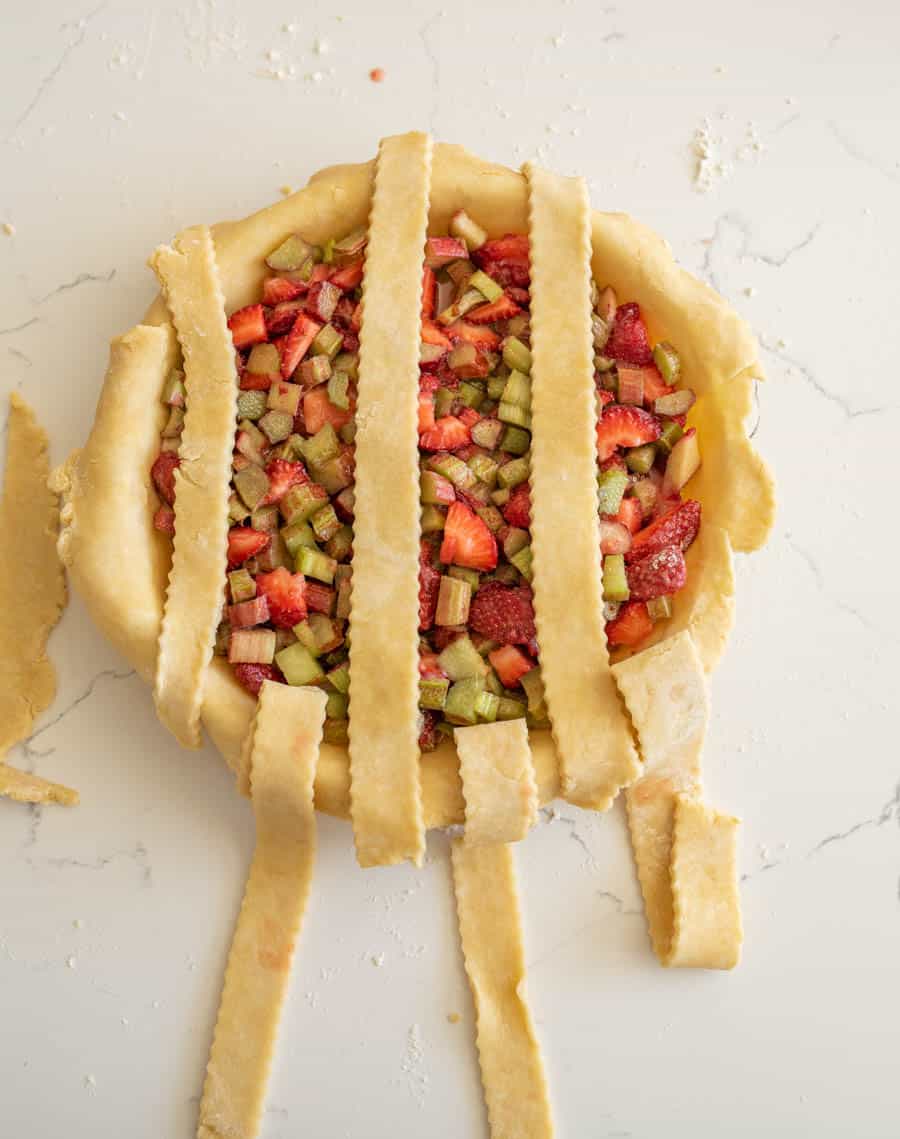
Step #15.Fold back 3 of the pie crust strips that you just laid on top of the pie, alternating pieces so that every other one is folded back.
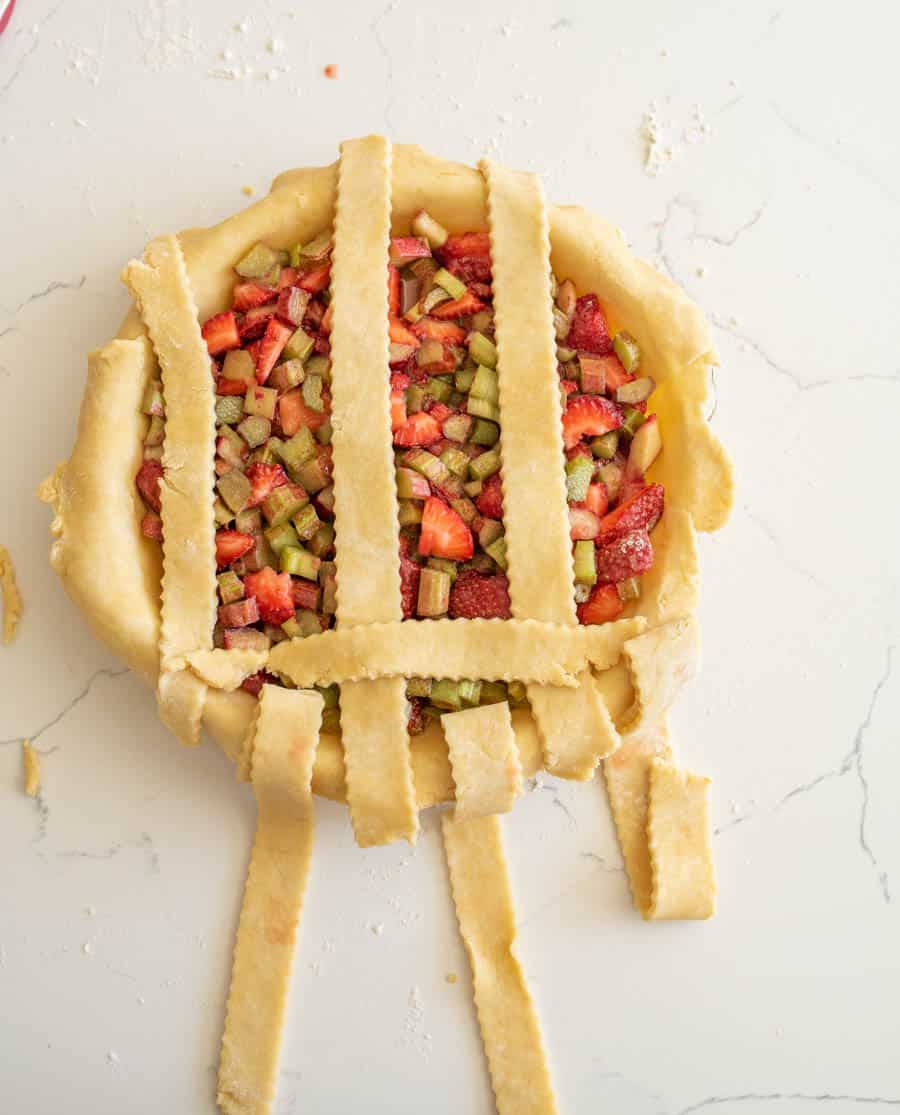
Step #16.Place a short crust strip near the edge of the pie (perpendicular to the ones you’ve already placed on the pie) on top of the strips that you have not folded back.
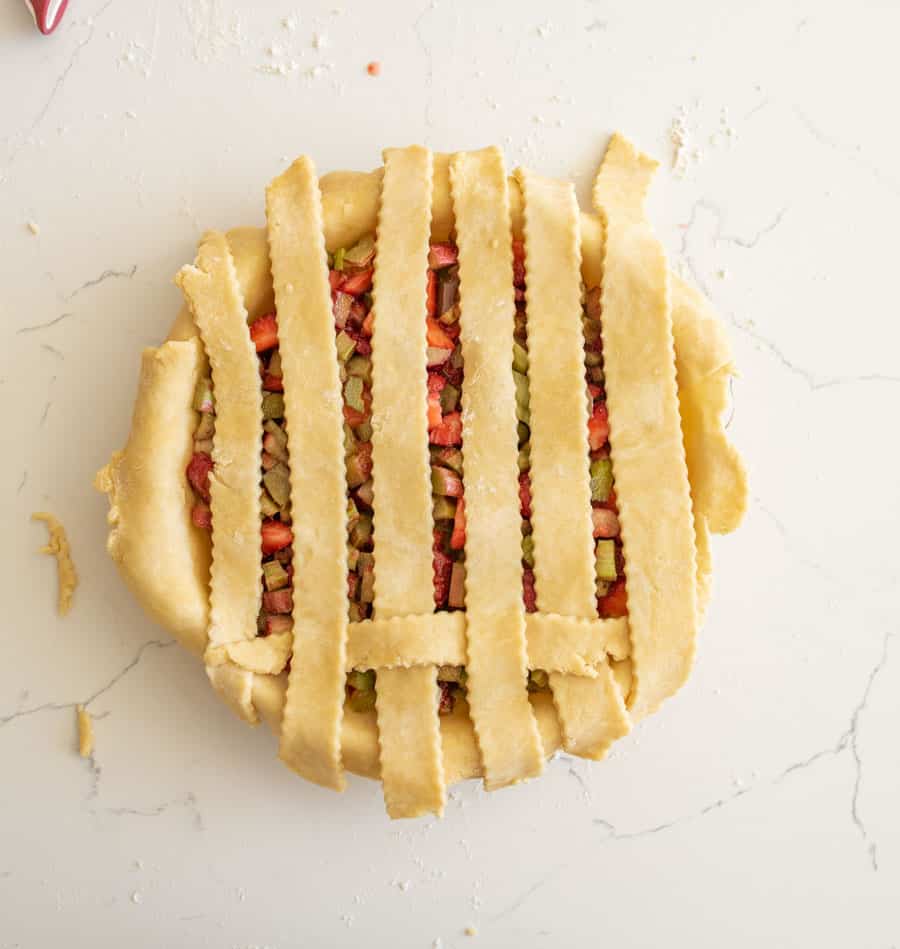
Step #17.Unfold the strips that are folded and rest them back on top of the pie. You’ve now done your first piece of lattice. The perpendicular strip will now be on top of 3 of the strips and under 3 of the strips.
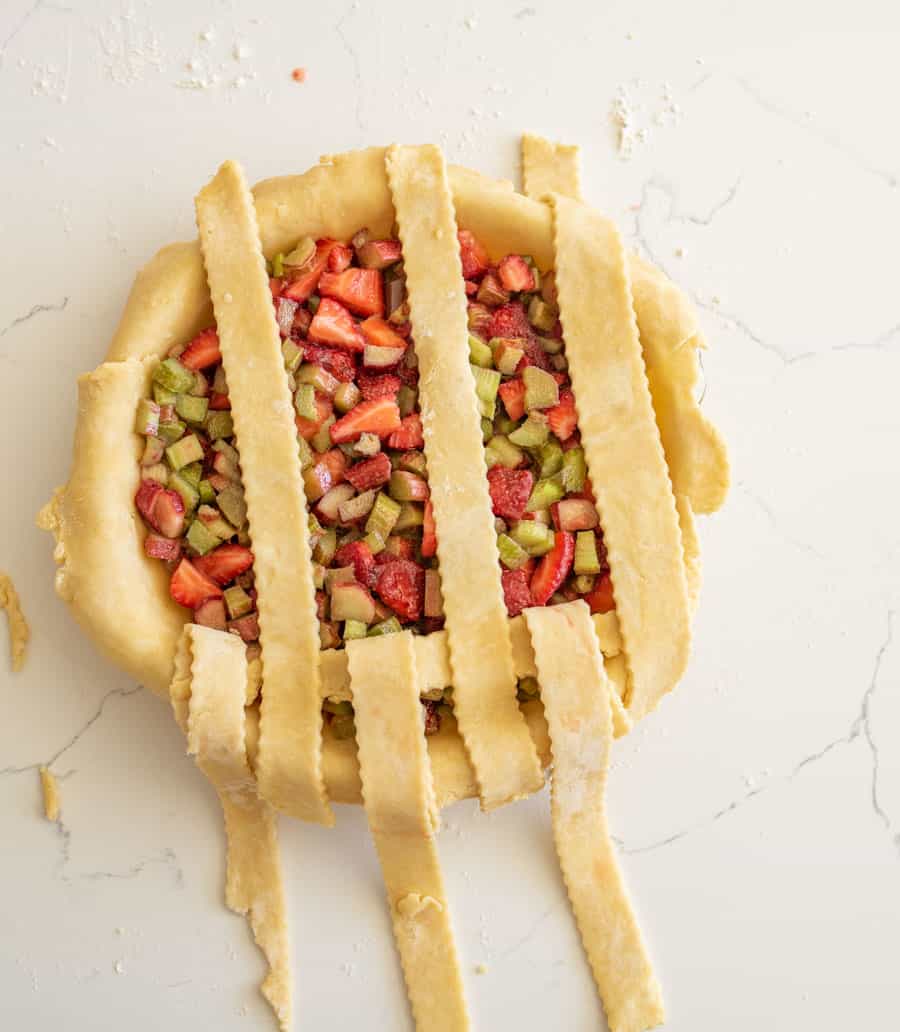
Step #18.Fold back the opposite 3 strips as last time and place a second strip of dough about 1/2 inch from the first perpendicular piece you set down.
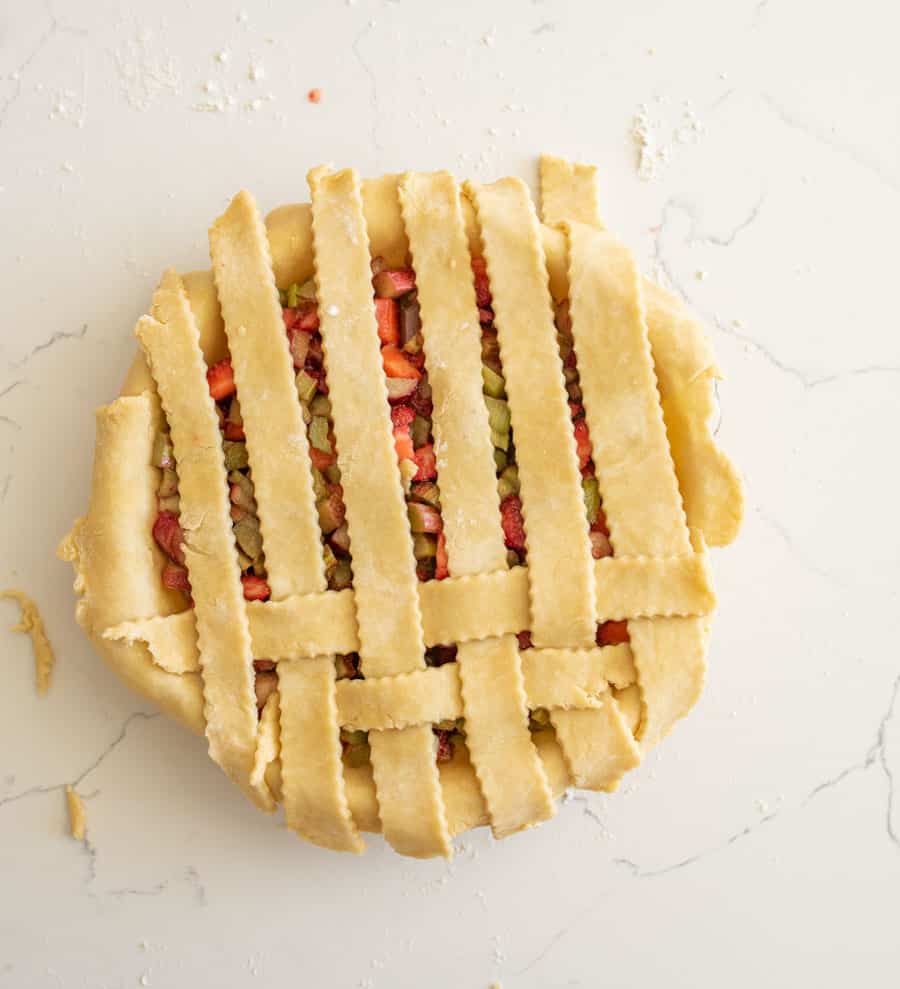
Step #19.Unfold the pie strips and gently rest them on top of the pie. You’ve now completed your second row of lattice work.
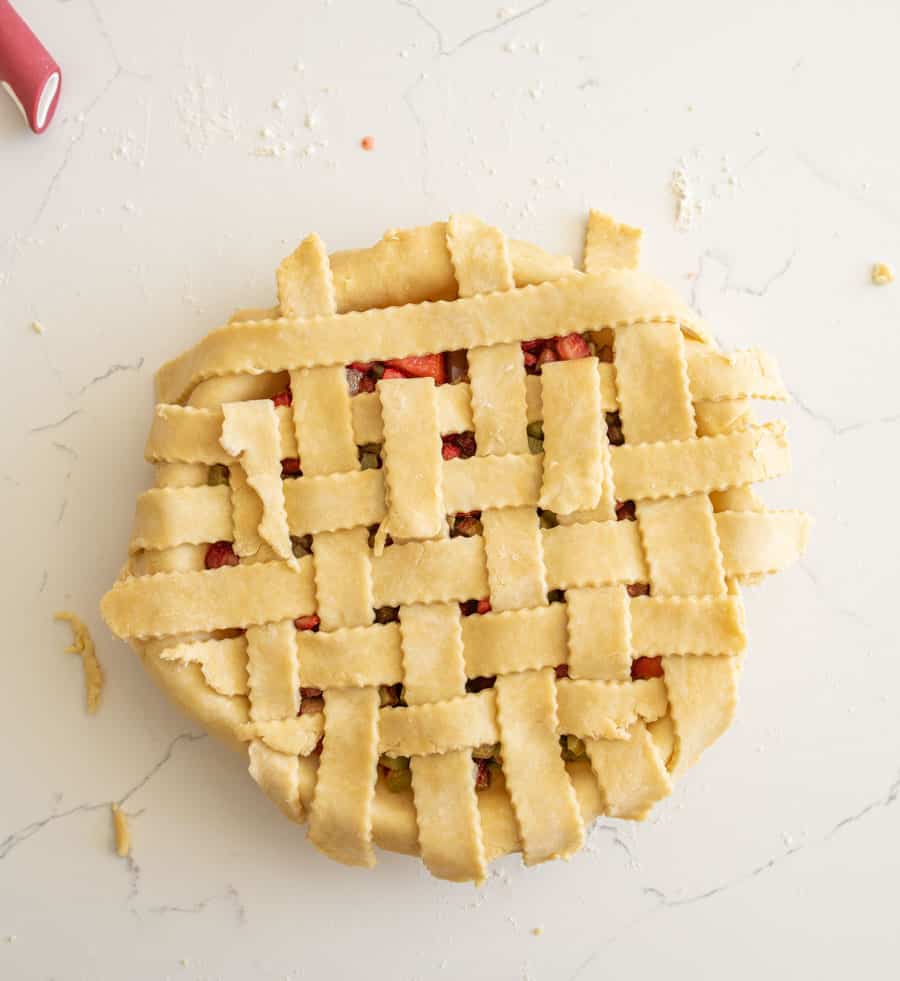
Step #20.Repeat this folding back 3 and laying down a new strip of pie crust (alternating which 3 you are folding back) until you’ve worked your way across the pie and added 6 perpendicular strips to the pie top.
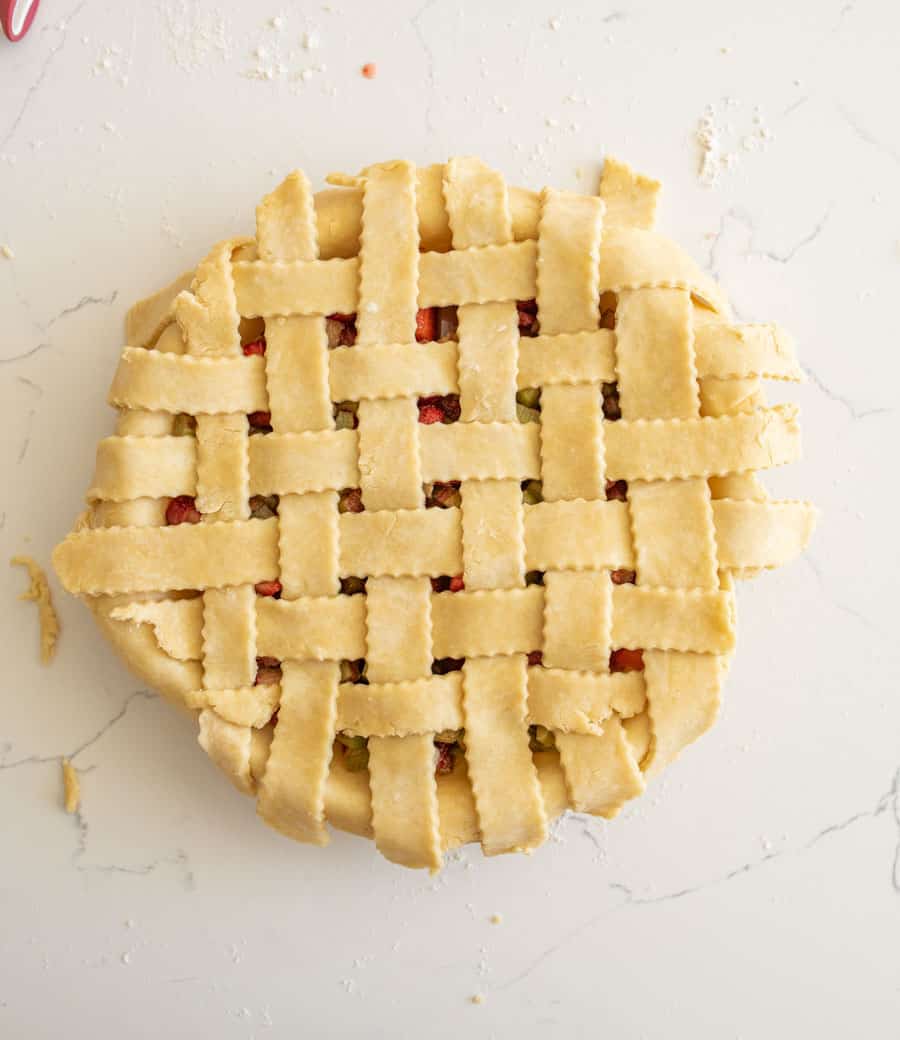
Step #21.Once all 12 strips of your lattice have been added, use scissors or a sharp knife to trim any dough that is hanging past the rim of the pie pan more than 1 inch.
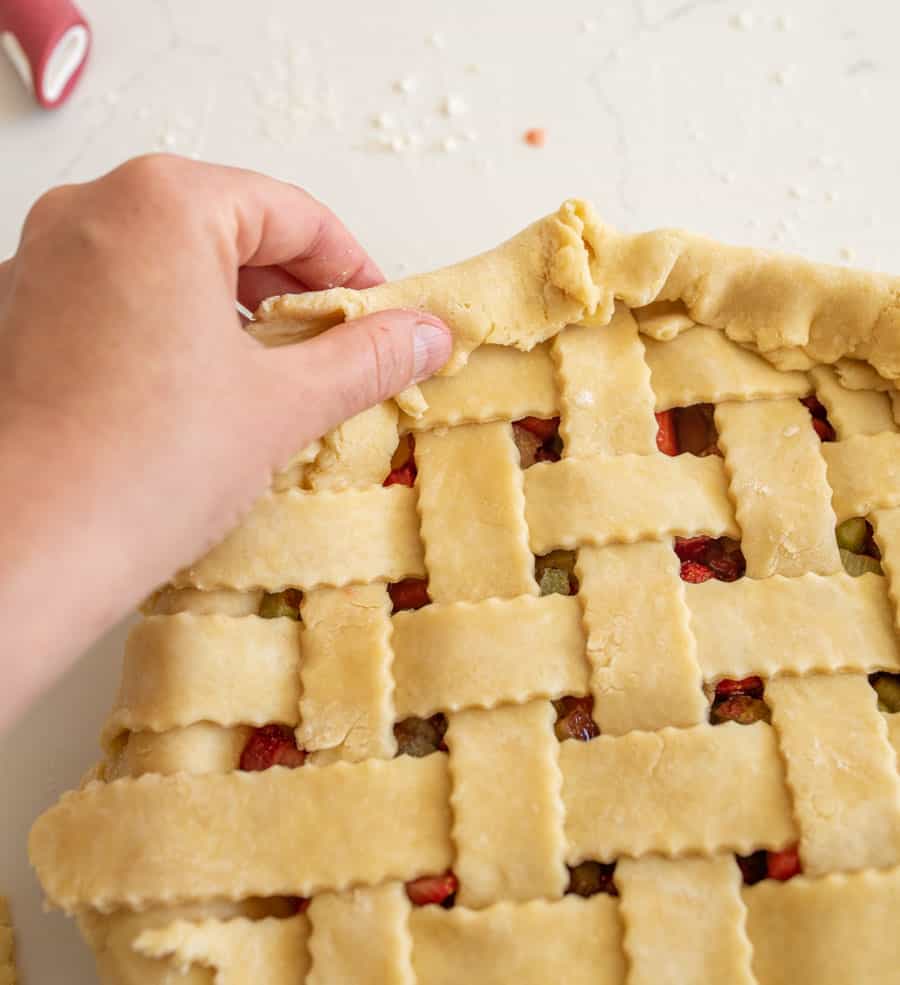
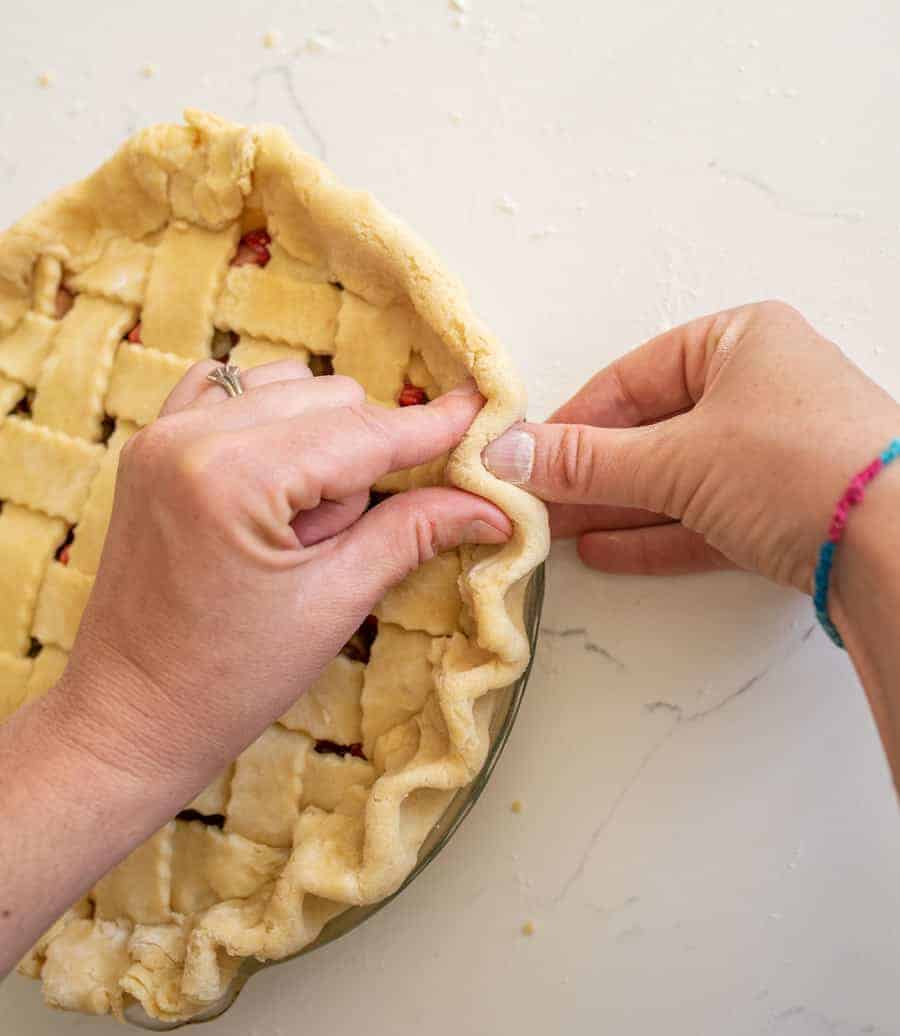
Step #22.Fold the bottom pie crust up and towards the pie center evenly around the whole edge of the pie to give it a clean look.
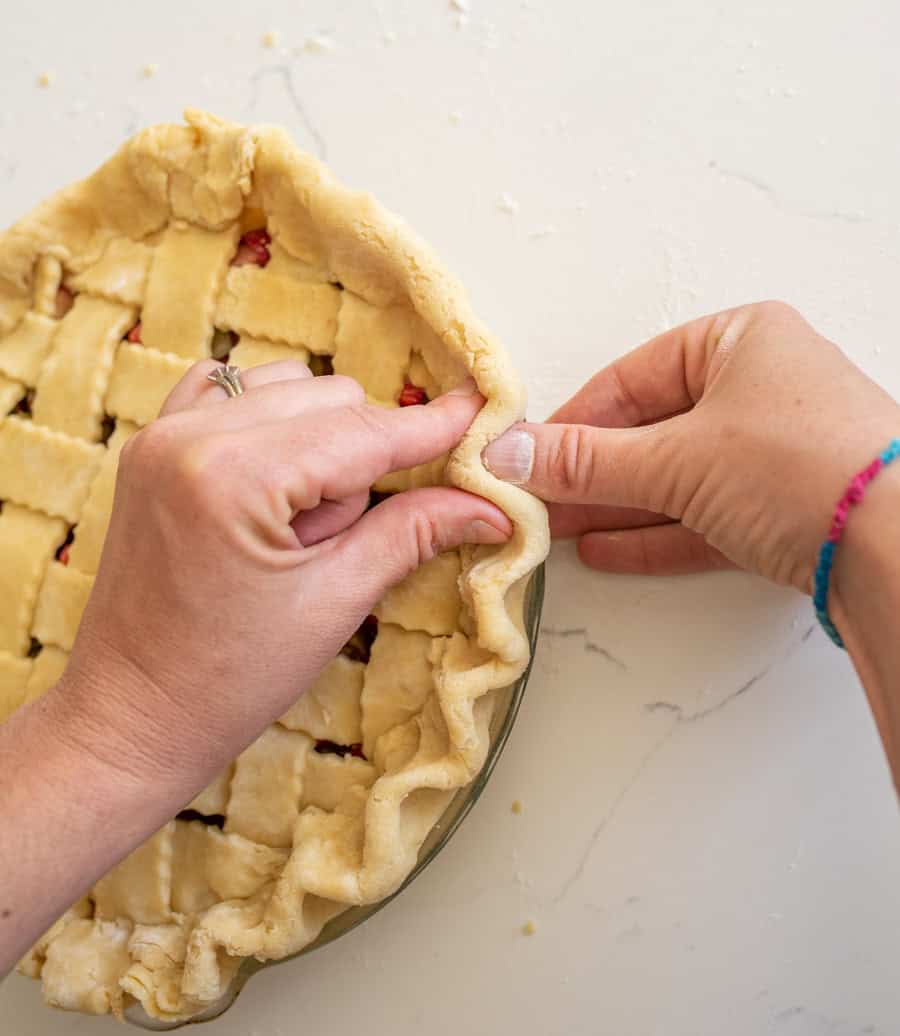
Step #23.Use your pointer finger and thumb from one hand and your thumb from the other hand to press and seal the pie crust. Do this evenly around the edge of the pie.
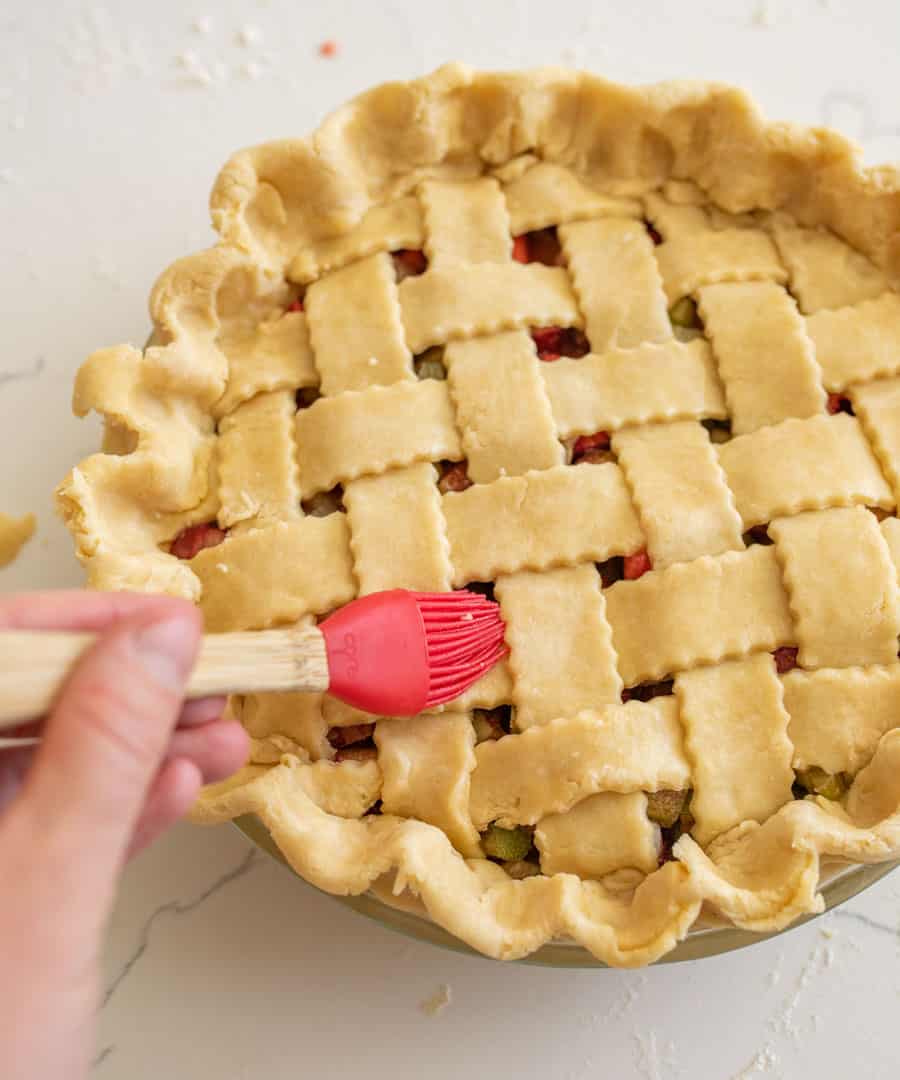
Step #24.Brush your finished lattice pie crust with water and sprinkle it with white sugar to give it a pretty finish. Then, continue to follow the directions on your pie recipe for baking.
Recipe FAQs
How do I ensure my lattice crust stays secure while baking?
Make sure to press the ends of the strips firmly into the edge of the pie crust to ensure it stays put while baking.
How do I prevent the lattice crust from burning while baking the pie?
You can prevent the lattice crust from burning while baking the pie by covering it loosely with aluminum foil (or a pie crust cover if you have one) halfway through baking.
Why does this recipe call for shortening and butter?
The combination of shortening and butter in this pie crust recipe helps create a flaky and tender crust texture.
Expert Tips
- When placing the crust strips,make sure they reach from one side of the pie crust to the other.
- You’ll have some shorter strips of pie dough because you cut a circle, souse the shorter strips on the edges of the pieand use the longest strips in the center of the pie.
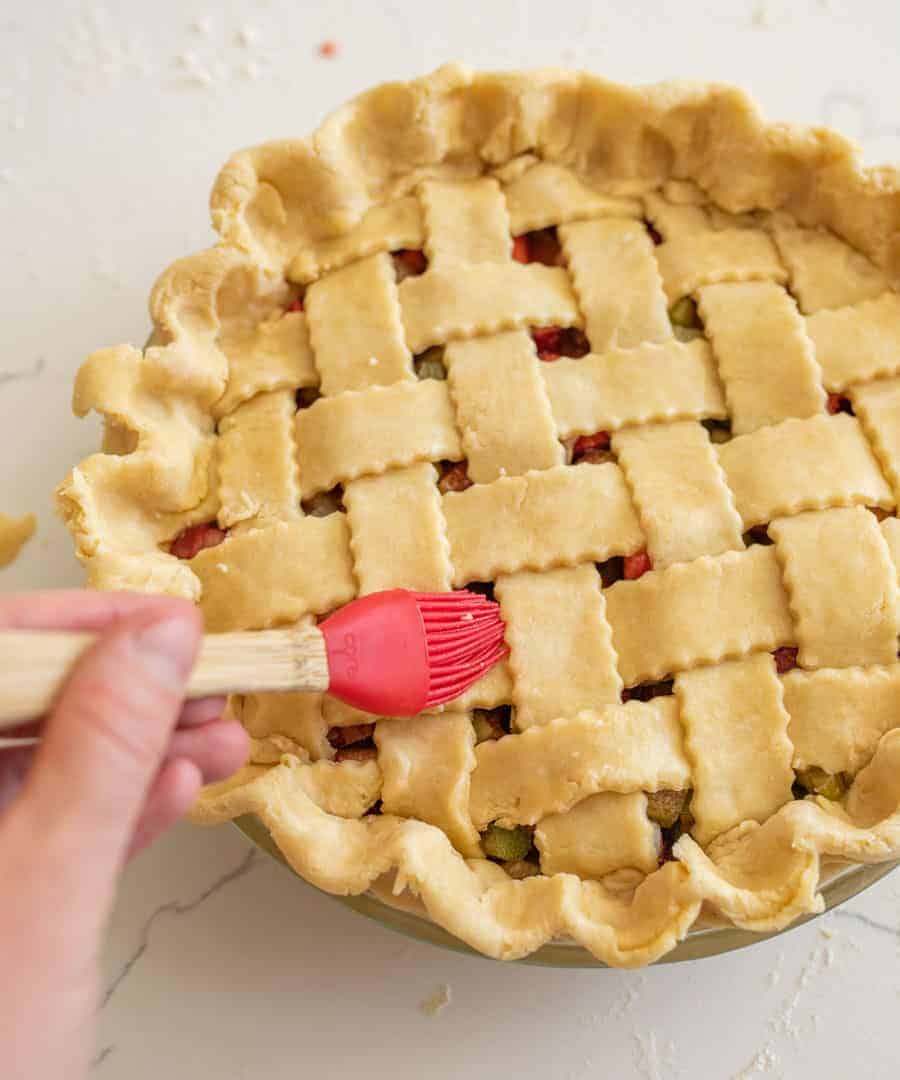
- Brushing your finished lattice pie crust with water and sprinkling it with white sugaris a beautiful way to finish a lattice pie crust.
- Be sure that the butter and water you use is coldor your crust will not have a flaky texture when baked.
- To get even strips for the lattice,use a ruler or straight edge and a pizza cutterto guide your cuts and spacing.
More Dessert Recipes to Consider
Did you make this recipe? Leave a⭐️review and share it onInstagram,Facebook, orPinterest!
I hope these step-by-step instructions helped you to visually see just how easy it is to lattice a pie crust. Once you’ve seen it and done it once, it’s much easier to make a pretty pie crust again and again.
More to cook
See the category Side Dishes and Salads
Romesco Sauce
 Recipes
Yum Yum Sauce
 Appetizers
Alabama White Sauce
 Easy Dinners
Slow Cooker Garlic Honey Meatballs
Building Our Dream HouseOur Biggest Mess: Stuff We Found in the Walls
 Side Dishes and Salads
Homemade Easy Egg Rolls
 Recipes
How To Preserve Cucumbers
 Easy Dinners