Home Craft Activities & DIY DIY Christmas Rag Wreath
Craft Activities & DIY
DIY Christmas Rag Wreath
Making a DIY Christmas Rag Wreath is a super easy way to add some holiday cheer to your house. All you need is some fabric and a wire hanger!
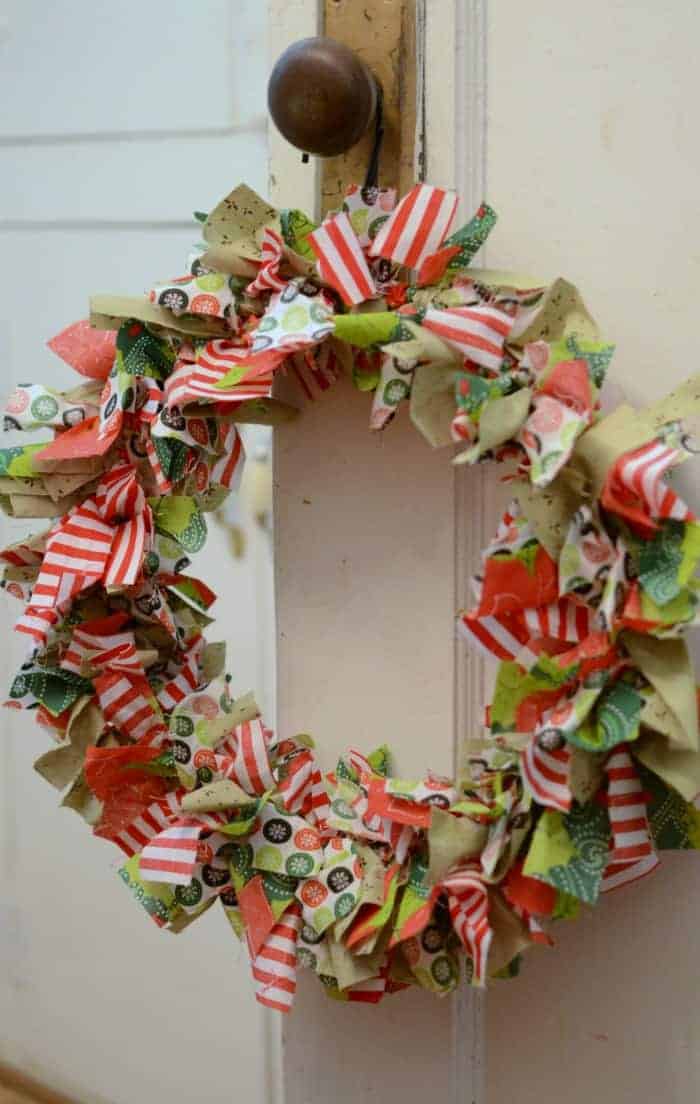
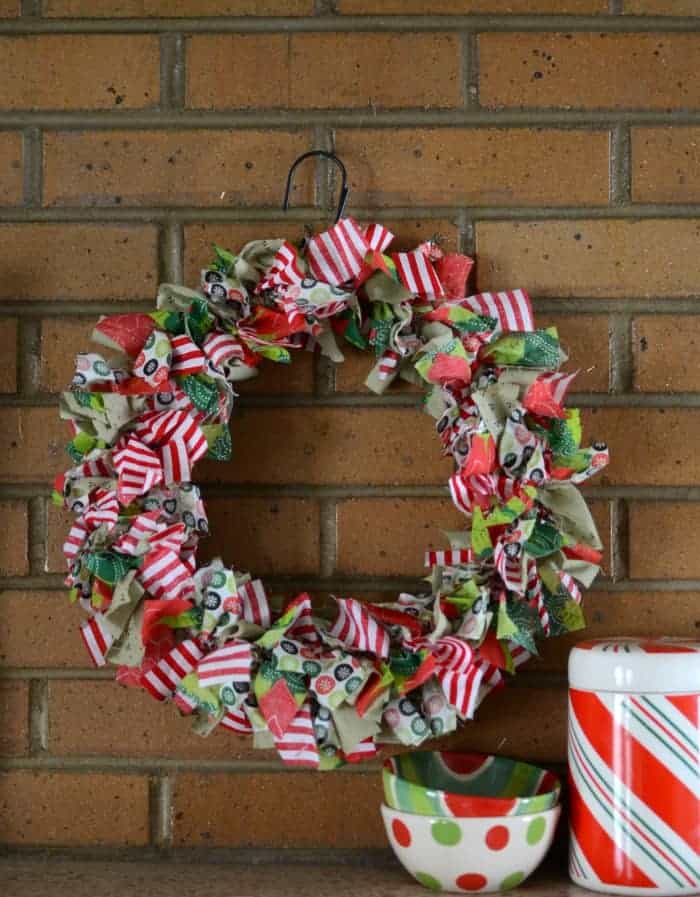
Making aDIY Christmas Rag Wreathis a super easy way to add some holiday cheer to your house. All you need is some fabric and a wire hanger – no wreath form required!
This DIY Christmas rag wreath project is a fun and easy craft project that is perfect for beginners and seasoned crafters alike. With just a few simple supplies you can create a beautiful wreath that can be used for any season by simply changing up the fabric.
This project is great as a service project at a church or school to give away, or for decorating your own home with a festive touch.
If you like this rag wreath, you may also enjoy makingSimple Embroidered Ornaments. Or for some easy gift to make, check outSimple DIY Beeswax CandlesandHomemade Beeswax Lip Balm.
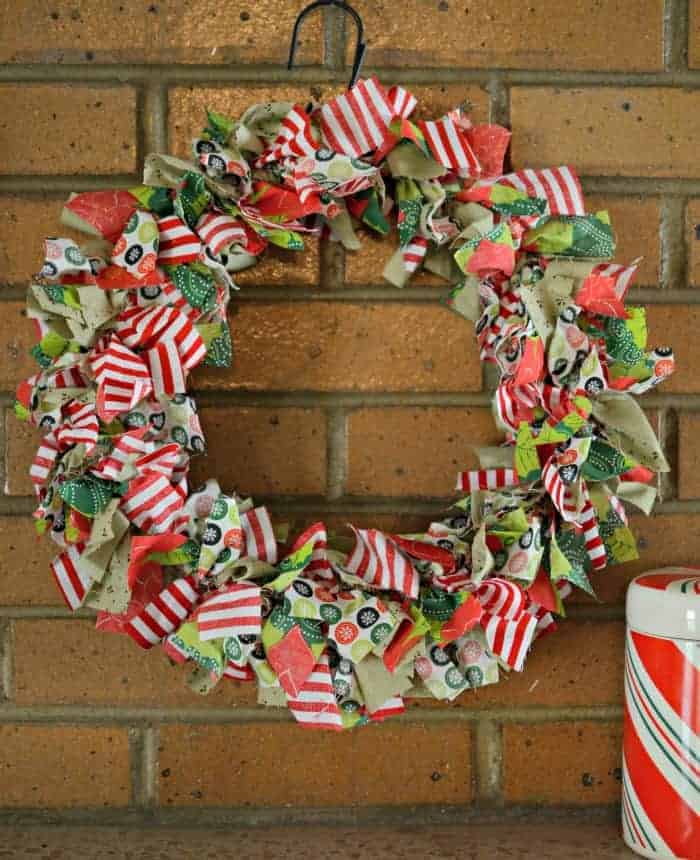
Why You’ll Love This Project
- It’s asuper easyno-fail craft.
- Canmake it for any seasonby changing up the fabric.
- Makes a great service projectfor a church or school to give away.
- Youcannot mess up this craft project– as long as you can tie a knot.
- Stores great– just needs a little fluff before using it again.
Supplies
- 5 fat quarters
- Wire hanger
- Rotary cutter and mat or scissors
How to Make a DIY Christmas Rag Wreath
- Step #1.Cut 15 strips of fabric that are 2 inches by 6 inches.
- Step #2.Shape the wire hanger into a circle. (The hook makes a perfect wreath hanger.)
- Step #3.Tie the fabric strips onto the hanger. Scrunch them together tightly as you go. You can single or double knot, it doesn’t really matter.
- Step #4.Continue to tie and scrunch the fabric together until the wreath is as full as you like it.
- Step #5.Fluff and twist the fabric so that it pokes out all over, the messier the better.
- Step #6.You can add a bigger bow to the top where the hanger neck is if you like.
Fabric Suggestions for a Rag Wreath
You have a million and one options when it comes to how your rag wreath looksdepending on the fabrics you choose. I chose to make a Christmas version and picked colors that matched my decor. I like true green, Christmas red, white, and a bright but traditional feel.
- Youcan use scrapsyou already have or you can pick up fat quarters (the precut squares) at the fabric store.
- Select 5 fabrics with a variety of prints, a couple with big prints, a couple with small prints, one solid (can have a subtle pattern on it or tone-on-tone).
- Try to findone or two fabrics that catch your eye.
- Yourfabrics don’t have to be super matchybecause some variation is going to make the wreath look more interesting.
- Most importantly,pick fabric you love!
FAQs
How much fabric do I need?
You have a few options… 5 fat quarters, 6 quarter-yard cuts of fabric, or 1.25 yards of one fabric. I wouldn’t recommend using fat eighths with this project because there is a lot more wasted fabric.
What is a fat quarter?
A fat quarter is a piece of fabric that is cut into a rectangle that’s 18 inch by 22 inches (which is a quarter of yard) instead of being cut into a regular quarter of a yard, usually measuring 9 by 44 inches.
Can I use quarter yard cuts of fabric to make this wreath?
Yes! If you use a normal quarter yard of fabric, you will need 6 quarter yards of fabric because you won’t get quite as many strips from each piece.
Expert Tips
- Using a rotary cutter is really handyhere. If you don’t have one, find someone to borrow it from!
- A 60mm rotary cutter is the best size for this project. The smaller ones take longer to cut the fabric and aren’t quite as sturdy (in my experience).
- Be sure to use a cutting mat under your rotary cutterso that you don’t damage the surface you’re cutting on.
- You canturn this wreath into any season by using a different color schemeof the fabric you use – pastels would be great for spring, red/white/blue for Memorial Day and 4th of July, and earth tones for the fall.
Tips for Making a DIY Christmas Wreath Rug with Kids
- For preschoolers, have all the fabric cut into the 2×6 inch strips so all they have to do is tie the strips onto the wire hanger.
- For elementary age kids, pre-cut the fabric into strips so that the kids only need to cut across each strip at 6-inch intervals and then tie them on the hanger.
- Most teensshould be able to handle a rotary cutter and mat with supervision and the rest of the instructions.
- If you have a mixed-age group, you could have stations where different ages are working on different parts of the process.
More Craft Projects to Consider
Did you make this recipe? Leave a⭐️review and share it onInstagram,Facebook, orPinterest!